Have you ever experienced the sheer frustration of unboxing a beautiful, brand-new ceramic pan, only to have your very first batch of morning eggs stubbornly cement themselves to the bottom? You are not alone. A common pain point for beginners is the heartbreaking realization that after just a few uses, their supposedly "non-stick" pan is suddenly turning every fried egg and seared chicken breast into a burnt, sticky mess. You might find yourself staring at the sink, scrubbing endlessly, and wondering: What exactly went wrong?
The truth is, ceramic cookware is a brilliant, healthy addition to any kitchen, but it operates under a completely different set of rules compared to traditional Teflon (PTFE) or heavy-duty cast iron. The secret to a flawless, sliding-egg experience lies in understanding the unique properties of the material.
In this comprehensive guide, we will break down the core issues behind why ceramic pans stick and provide you with a masterclass in ceramic care. From the vital "hot pan, cold oil" technique to precise temperature control and proper cleaning methods, we are going to explore the science of non-stick cooking. Backed by material science, laboratory data, and real-world user experiences, here are 7 practical, pro-level tips and beginner pitfall warnings to keep your ceramic pan performing flawlessly for years.
1. Why Do Ceramic Pans Stick? The Science Behind It
Before we can fix the problem, we need to understand the science of the surface. When you look at a ceramic pan, the surface appears perfectly smooth and glossy. However, under a microscope, the ceramic coating (which is typically a silica-based sol-gel) is actually highly porous. It is filled with microscopic peaks and valleys.
The Material Characteristics
When food—particularly protein-rich foods like eggs or meats, or starch-heavy foods like potatoes—hits a pan that isn't properly prepared, those proteins and starches seep into the nano-level pores of the ceramic. As the heat rises, the food physically bonds with the ceramic surface, creating a stubborn, burnt layer. Furthermore, ceramic is an insulator. It conducts heat relatively slowly compared to aluminum or copper. If heated improperly, it can develop localized "hot spots" that cause food to burn and stick in specific areas while remaining undercooked in others.
Common Missteps
Beginners often treat ceramic pans like traditional Teflon. They commit cardinal sins such as throwing cold food into a cold pan with cold oil, blasting the pan on maximum heat, using metal spatulas, or scrubbing the pan with harsh abrasive detergents. Every single one of these actions actively destroys the delicate non-stick layer.
The Hard Data
Laboratory tests and kitchen trials paint a clear picture of how user error affects performance. Data shows that frying an egg using the "cold pan, cold oil" method results in an 85% sticking rate. Conversely, using the proper "hot pan, cold oil" technique drops that sticking rate to a mere 10%. Furthermore, cleaning a ceramic pan just once with a harsh steel wool scouring pad can degrade its non-stick performance by a staggering 40%.
2. Tip 1: Master the "Hot Pan, Cold Oil" Technique
If you only take away one piece of advice from this guide, let it be this: the "Hot Pan, Cold Oil" method is the absolute golden rule of cooking with ceramic.
Step-by-Step Execution
① Place your clean, dry ceramic pan on the stove over medium-low heat. Let it preheat empty for about 1 to 2 minutes.
② Perform the water drop test: flick a tiny drop of water into the pan. If it sizzles and evaporates instantly, the pan is too cold. If it forms a perfect little bead and dances or rolls around the surface of the pan (a phenomenon known as the Leidenfrost effect), your pan is perfectly preheated.
③ Immediately wipe away the water, pour in your cold cooking oil, and swirl it to evenly coat the bottom of the pan.
④ Wait just a few seconds until the oil begins to shimmer (but not smoke heavily), and then add your ingredients.
The Principle Behind the Magic
Why does this work? When you preheat the dry pan, the heat causes the microscopic pores in the ceramic to physically expand and then tighten, creating a smoother surface. When you introduce cold oil to this hot surface, the oil acts as an impenetrable barrier, filling in any remaining microscopic valleys. This prevents the proteins in your food from ever making direct contact with the bare ceramic. Additionally, the hot oil instantly sears the outside of the food, locking in moisture and preventing the food from acting like a sponge.
Beginner Notes
Do not preheat the pan for too long, as overheating can cause the oil to instantly smoke and burn when added. Furthermore, choose your fats wisely. Vegetable oil, canola oil, avocado oil, or clarified butter (ghee) are excellent. Avoid extra virgin olive oil for frying in ceramic pans; it has a very low smoke point and will quickly polymerize, leaving a sticky, invisible residue on your pan that ruins the non-stick coating.
3. Tip 2: Avoid High Heat and Dry Burning
Ceramic pans are designed for gentle, even cooking. They are not designed for the roaring flames of a commercial kitchen.
The Thermal Limits of Ceramic
Most high-quality ceramic pans have a safe operating temperature range of 200°C to 260°C (roughly 400°F to 500°F). While the base metal of the pan can handle more, exceeding 300°C (572°F) will cause the silica-based ceramic coating to begin breaking down at a molecular level. Once this thermal degradation occurs, the non-stick properties are permanently lost, and no amount of oil will bring them back.
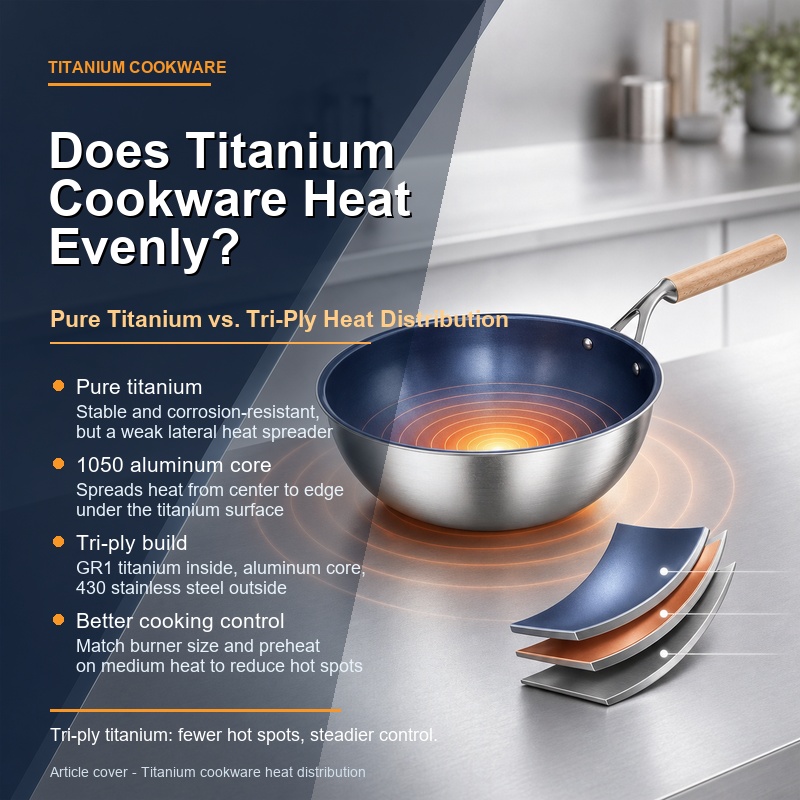
A quick note on cookware materials: If your cooking style heavily involves aggressively searing thick steaks at maximum heat, blackening fish, or using a wok over a high-BTU gas burner, you should look into the advantages of titanium cookware or traditional cast iron. Titanium, for instance, is incredibly durable and can withstand extreme, blazing temperatures without warping or degrading. Ceramic, by contrast, is the tool you use for finesse—perfect for eggs, delicate fish, sautéed vegetables, and pancakes.
Cooking Recommendations
For daily cooking, such as stir-frying vegetables or making omelets, stick to medium-low to medium heat (around 120°C - 180°C). If you are pan-frying chicken breasts or fish, you can bump it up to medium-high, but you must avoid "dry burning" (leaving an empty pan on the heat) for more than 3 minutes.
Emergency Protocol
If you accidentally leave your pan on the stove and it begins to dry burn and smoke, do not panic. Turn off the heat immediately and carefully move the pan to a cool burner. Never run a blazing hot ceramic pan under cold water. The sudden temperature change (thermal shock) will cause the ceramic coating to instantly crack, craze, or completely shatter. Allow it to cool naturally at room temperature.
4. Tip 3: Use the Right Utensils to Protect the Coating
The physical integrity of your ceramic coating is just as important as temperature control. The non-stick layer is relatively thin and can be easily scratched by hard materials.
Choosing Your Culinary Weapons
You must be strict about the tools that touch your pan. Always prioritize silicone spatulas, wooden spoons, or heat-resistant nylon turners. Silicone is arguably the best choice, as its soft, flexible edges can glide across the ceramic surface without leaving microscopic micro-abrasions.
What to Ban from Your Kitchen
Absolutely never use metal spatulas, forks, knives, or metal tongs inside a ceramic pan. Even a light scrape with a metal fork while scrambling eggs can create a tiny fissure in the coating. Once the coating is breached, moisture and oils will seep underneath the ceramic layer during cooking, causing it to bubble, peel, and lose its non-stick capabilities entirely.
5. Tip 4: Master How to Clean Ceramic Cookware
Learning exactly how to clean ceramic cookware is the ultimate secret to longevity. Improper cleaning is the number one reason beginners ruin their pans within the first month.
The Gentle Wash Method
Always allow your pan to cool down completely before washing. Once cool, use warm water, a few drops of mild dish soap, and a soft microfiber cloth or the soft sponge side of a cleaning pad. Avoid highly concentrated, heavy-duty dish soaps, especially those that contain citrus extracts or abrasive polishing particles, as these will slowly eat away at the glossy finish.
Dealing with Stubborn, Burnt Food
If you made a mistake and have a layer of burnt food stuck to the bottom, resist the urge to grab a scouring pad or steel wool. Instead, use the baking soda method:
① Fill the cooled pan with warm water until the burnt areas are covered.
② Add 2 to 3 tablespoons of baking soda and stir gently.
③ Let the pan soak for 10 to 15 minutes. The alkaline nature of the baking soda will naturally break down the carbonized food bonds.
④ After soaking, take a soft sponge and gently wipe the grime away. It should lift off effortlessly.
Post-Wash Maintenance
Never let your ceramic pan air dry, as hard water stains can leave mineral deposits that interfere with the non-stick surface. Always dry the pan immediately with a soft paper towel or a clean dish towel.
6. Tip 5: Season Your Ceramic Pan Regularly
Wait, season a ceramic pan? Yes! While cast iron is famous for needing seasoning, ceramic pans also benefit immensely from a micro-layer of polymerized oil to maintain their slick surface.
The Initial Unboxing Seasoning
When you first buy your pan, wash it gently with warm soapy water to remove any factory dust, and dry it completely. Next, pour a small amount of high-smoke-point cooking oil (like canola or grapeseed oil) into the pan. Use a paper towel to rub the oil all over the interior surface. Place the pan on the stove over medium-low heat for about 3 to 5 minutes. This allows the oil to penetrate the microscopic pores of the ceramic. Turn off the heat, let it cool completely, and then wipe out the excess oil with a clean paper towel. Your pan is now primed and ready for action.
Ongoing Maintenance
The factory non-stick coating will naturally wear down over time. To combat this, you should re-season your pan every 10 to 15 uses. Alternatively, an old kitchen trick is to take a small piece of fatty pork (pork fat) and rub it around the heated pan once a week. This natural animal fat creates a beautiful, slick protective film.
Crucial Note: After you season the pan, do not immediately wash it with heavy dish soap, as this will strip the protective oil membrane you just worked hard to create. Simply wipe it clean or rinse it lightly with warm water.
7. Tip 6: Control Cooking Temperatures for Different Foods
Not all foods react to heat the same way, and understanding how to manipulate your stove's dial based on your ingredients will drastically reduce sticking.
Eggs and Leafy Greens (120°C - 150°C)
Eggs are notorious for sticking because their proteins coagulate rapidly. Cook eggs and delicate vegetables on medium-low heat. Use a quick stir-frying motion for scrambled eggs, and never leave them sitting unattended on the heat for too long.
Meats and Fish (180°C - 220°C)
When cooking chicken, pork, or fish fillets, use medium to medium-high heat. The trick to preventing meat from sticking is patience. When you place a piece of meat in the hot, oiled pan, it will initially grip the ceramic. Do not touch it. Allow the Maillard reaction to occur. Once a proper crust forms on the surface of the meat (usually after 3-4 minutes), it will naturally release itself from the pan, allowing you to flip it effortlessly. Forcing the flip too early will tear the meat and leave a sticky residue behind.
Soups, Stews, and Porridge (80°C - 100°C)
For liquid-heavy dishes, keep the heat low. Cover the pan with a lid to create a gentle simmering environment. Avoid bringing thick liquids like porridge to a rolling boil, as the starches will rapidly sink to the bottom and scorch, creating a thick, burnt layer that is difficult to clean.
Pro Tip: Stop guessing your temperatures. Use an infrared kitchen thermometer to check the surface heat of your pan, or rely on the water drop test mentioned in Tip 1 to ensure you are in the safe zone.
8. Tip 7: Avoid Common Beginner Mistakes and Acidic Damage
Even if you master the heat and the oil, certain everyday habits can silently destroy your cookware. Here are the final pitfalls you must avoid.
Mistake 1: The Acid Attack
Cooking highly acidic foods—such as tomato sauce, vinegar-based reductions, or lemon butter sauces—can be tough on ceramic. The acid slowly corrodes the sol-gel coating. While you can cook these foods in ceramic, the mistake beginners make is leaving the acidic food sitting in the pan for hours after cooking. Always remove acidic foods immediately after cooking and rinse the pan to neutralize the surface.
Mistake 2: The Dishwasher Trap
Many brands advertise their ceramic pans as "dishwasher safe." While the pan won't melt in the dishwasher, the incredibly harsh, abrasive detergents used in dishwasher pods, combined with prolonged exposure to high-pressure scalding water, will strip the non-stick coating remarkably fast. Always hand wash your ceramic pans.
Mistake 3: Improper Storage
Stacking your pots and pans in the cabinet is a great way to save space, but the hard metal bottom of the pot on top will scratch the delicate ceramic surface of the pan below. If you must stack your cookware, place a felt pan protector, a silicone mat, or even just a simple paper towel between each pan to cushion the coating.
9. Final Verdict: Keep Your Ceramic Pan Non-Stick for Years
The transition from traditional cookware to ceramic requires a slight adjustment in your culinary habits, but the payoff is immense. By understanding that ceramic is a delicate, heat-retaining material rather than a piece of indestructible metal, you can unlock its true potential.
The Bottom Line:
The secret to preventing your ceramic pan from sticking boils down to a few non-negotiable rules: always utilize the "hot pan, cold oil" technique, strictly avoid high heat and dry burning, use soft silicone utensils, and treat the cleaning process with care.
Actionable Advice for Beginners:
Starting today, implement these 7 pro tips. Commit to hand-washing your pan with a soft sponge, give it a brief oil seasoning once a week, and turn your stove dial down a notch. If you avoid the common pitfalls of metal utensils and abrasive scrubbing, a high-quality ceramic pan will reward you with a flawless, non-toxic, non-stick cooking experience that can easily last for 2 to 3 years of daily use.
Frequently Asked Questions (FAQ)
Q1: Is non stick ceramic cookware safety a real concern? Are there hidden chemicals?
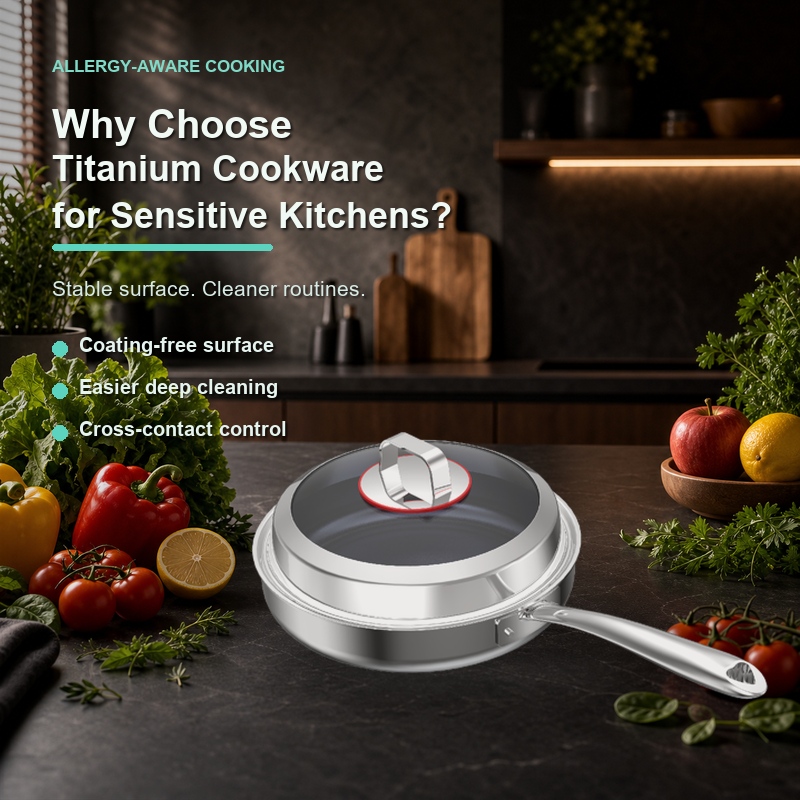
A: Non stick ceramic cookware safety is actually one of its biggest selling points. Unlike traditional Teflon (PTFE) pans, genuine ceramic coatings are made from inorganic silica (sand) and are completely free of PFOA, PFOS, PFAS (forever chemicals), lead, and cadmium. Even if you accidentally overheat a ceramic pan, it will not release toxic fumes into the air, making it one of the safest cookware options for your home and your pets.
Q2: I accidentally burnt food onto my pan and scrubbed it with a scouring pad. Is it ruined?
A: If you used a harsh abrasive like steel wool, you have likely caused micro-scratches that removed a portion of the non-stick glaze. While the pan is still safe to use (since there are no toxic chemicals underneath), foods will likely stick to that specific scratched area in the future. You can try to mitigate this by doing a deep oil seasoning (as outlined in Tip 5), but the factory non-stick perfection may be permanently compromised.
Q3: Can I use cooking sprays like Pam on my ceramic pan?
A: No. Aerosol cooking sprays contain chemical propellants and emulsifiers (like soy lecithin) that do not burn off cleanly. Over time, these propellants build up on the ceramic surface, creating an invisible, sticky residue that ruins the non-stick properties. Always use pure liquid oils or butter instead.
Q4: Exactly how to clean ceramic cookware if it has a greasy, sticky film that won't wash off?
A: If your pan feels sticky even after washing, it has a buildup of polymerized oil (often caused by using low-smoke-point oils or cooking sprays). To remove this, create a paste using baking soda and a little water. Rub this paste gently over the sticky areas with a soft sponge, let it sit for 15 minutes, and then wash it away with warm water and mild soap. The gentle alkalinity of the baking soda will cut through the polymerized grease without scratching the ceramic.